The **Second Sea update** in *Fisch* introduces a thrilling array of new **Rods**, each tailored to enhance your fishing experience with unique abilities and playstyles. Whether you're after lightning-fast lure speeds, substantial luck boosts, or intriguing passives that summon creatures or trigger rare mutations, there's a **Rod** perfect for every type of angler. In this comprehensive guide, we'll delve into the strengths, weaknesses, and optimal enchantments for each new **Rod**, helping you select the ideal one for your fishing adventures.
Fisch Second Sea Rod List
Here's a detailed rundown of all the new **Rods** introduced in the **Second Sea** update for *Fisch*:
| Rod | Price | Stats | Ability | Enchantment |
|---|---|---|---|---|
 | 500,000 E$ | **Lure Speed**: 65% **Luck**: 80% **Control**: 0.12 **Resilience**: 12 **Max Kg**: 8000kg | • **Summon Cthulhu** (1%) | • **Hasty** • **Steady** |
 | 200,000 E$ | **Lure Speed**: 25% **Luck**: 150% **Control**: 0.15 **Resilience**: 10% **Max Kg**: 5000kg | • **Skeletal Flowering** (20%) | • **Hasty** • **Swift** |
 | 100,000 E$ | **Lure Speed**: 25% **Luck**: 150% **Control**: 0.15 **Resilience**: 10% **Max Kg**: 5000kg | • **Mystic Tree** (10%) | • **Hasty** • **Swift** |
 | 100,000 E$ | **Lure Speed**: 25% **Luck**: 105% **Control**: -0.01 **Resilience**: 55% **Max Kg**: 100,000kg | • **Stab** | • **Hasty** • **Swift** |
 | 70,000 E$ | **Lure Speed**: 10% **Luck**: 90% **Control**: 0.15 **Resilience**: 8% **Max Kg**: 5000kg | • **Perfect Combo** | • **Resilient** • **Controlled** |
 | 12,000 E$ | **Lure Speed**: 20% **Luck**: 100% **Control**: 0.05 **Resilience**: 5% **Max Kg**: 650kg | • **Lucky Frogs** | • **Resilient** • **Controlled** |
 | 9,500 E$ | **Lure Speed**: 75% **Luck**: 35% **Control**: -0.01 **Resilience**: 0% **Max Kg**: 175kg | • **None** | • **Lucky** • **Divine** |
 | 7,000 E$ | **Lure Speed**: 30% **Luck**: 55% **Control**: 0.07 **Resilience**: 12% **Max Kg**: 700kg | • **None** | • **Hasty** • **Swift** |
 | Free | **Lure Speed**: 10% **Luck**: 10% **Control**: None **Resilience**: 5% **Max Kg**: 104kg | • **None** | • **None** |
We recommend saving up your E$ to invest in one of the higher-cost **Rods**, as they offer superior performance. The **Great Dreamer Rod** and **Verdant Shear Rod** boast unique effects that set them apart from the rest. Below, you'll find a list of locations and a detailed overview of the best enchantments for each **Rod**.
All Fisch Second Sea Rod Locations
Here are the known locations for all the **Rods** in the **Second Sea** Update in *Fisch*:
- **Great Dreamer Rod**: Near a tree at the back of Cursed Shores Island.
- **Free Spirit Rod**: Near the Angler on Isle of New Beginnings.
- **Verdant Shear Rod**: Near the Merchant on Lushgrove Island.
- **Azure of Lagoon Rod**: Bottom of the ladder near the Inn Keeper at Azure Lagoon.
- **Blazebringer Rod**: Near the small pond on Emberreach Island.
- **Frog Rod**: Near the Waveborne Pond.
- **Firefly Rod**: The merchant at Waveborne Island.
- **Wildflower Rod**: The merchant at Waveborne Island.
- **Adventurer’s Rod**: Received automatically when entering the Second Sea for the first time.
Second Sea Rod Enchantment and Overview
Great Dreamer Rod
The **Great Dreamer Rod** is a top choice for fishing in *Fisch*, with an impressive **65% lure speed**—the best outside of the specialized **Firefly Rod**—and well-balanced stats. Its standout feature is a **1% chance to summon Cthulhu**, who will snatch a fish with the guaranteed **Cursed Touch** mutation. While this adds excitement, the rarity of the effect means it's not the most reliable for **E$ farming**. For a more consistent choice, consider the **Free Spirit Rod**.
To maximize your catches, **Hasty** or **Steady** enchantments can speed up your fishing, increasing opportunities to trigger Cthulhu's appearance. **Lucky** or **Divine** enchantments can enhance its already solid luck stat, making it an even stronger all-around option.
Free Spirit Rod
The **Free Spirit Rod** is ideal for late-game players, offering a massive **150% luck boost** and excellent control. Its unique passive, **Skeletal Flowering**, has a **20% chance** to trigger, causing a shower of purple gemstones that apply the valuable **Bloom mutation** to your catch. It also features the **“stab” ability**, which speeds up minigame progress by **about 6%**, enhancing fishing efficiency.
Given its strong stats and money-making potential, this rod is a top-tier choice. However, its **average lure speed** can be improved with **Hasty** or **Swift** enchantments, allowing you to reel in fish faster and activate its powerful passive more often.
Verdant Shear Rod
The **Verdant Shear Rod** is a versatile powerhouse, featuring an impressive **150% luck stat** and excellent control. Its unique passive ability has a **10% chance** to grow a **tree** during the daytime, lasting **1 minute**. While active, any fish you catch has a **10% chance** to gain the **Mother Nature, Green Leaf, or Brown Wood** mutations.
To maximize this ability, use **Sundial Totems** to extend daytime, providing more opportunities to trigger the tree. **Hasty** or **Swift** enchantments can help you catch fish faster during this window, maximizing your rewards.
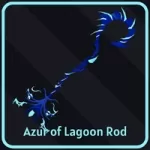
Azure of Lagoon Rod
If you're aiming to catch massive fish, the **Azure of Lagoon Rod** is ideal, with an incredible **100,000kg max weight** and **55% resilience**. It also features a **“stab” passive**, similar to the **Trident Rod**, which **advances minigame progress by about 6%**, unaffected by debuffs.
The main drawback is its **negative control**, which can make perfect catches more challenging. **Controlled enchantments** can help improve accuracy, while **Hasty** or **Swift enchantments** can boost its **mediocre lure speed**, ensuring a smoother fishing experience.
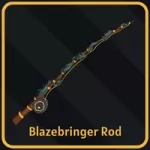
Blazebringer Rod
The **Blazebringer Rod** excels with its combo-based passive ability. After **10 consecutive perfect catches**, the rod’s bar **glows red with sparks**, granting **+10% luck** across all pools and a chance to apply **Ember (15%)** and **Cracked (10%)** mutations. Reach **35 perfect catches in a row**, and the bar **erupts in flames**, boosting the luck bonus to **+25%**, guaranteeing **Ember mutations (100%)**, and providing a **5% chance** for the valuable **Emberflame mutation**.
However, **missing a perfect catch resets all progress**, making precision essential. **Resilient** or **Controlled enchantments** are highly recommended to maintain your streak.
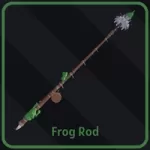
Frog Rod
The **Frog Rod** is an excellent choice, boasting a **100% luck stat** and a fun, luck-boosting passive ability. With every perfect catch, there’s a chance to **spawn a frog**, increasing your **luck by +0.5x for 2 minutes**. You can have up to **3 frogs active at once**, stacking for a **total luck boost of +1.5x**—bringing your overall **luck multiplier to 2.5x**!
Despite its low lure speed and resilience, making perfect catches trickier, its passive depends on precision, so **Resilient** or **Controlled enchantments** are essential. **Hasty** or **Swift enchantments** can help counter the slow lure speed, keeping your fishing fast and efficient.
Firefly Rod
The **Firefly Rod** is the fastest in the **Second Sea**, boasting an unmatched **75% lure speed** for quick casting and reeling. However, this speed comes at the cost of negative control, **zero resilience**, and low max weight, making it less ideal for bigger or rarer fish.
This rod excels at quickly farming common, lightweight fish. To improve its effectiveness, **Lucky** or **Divine enchantments** can boost its **below-average luck stat**, while **Resilient** or **Controlled enchantments** can compensate for the negative control, making fishing smoother.
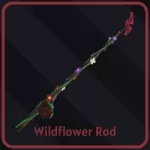
Wildflower Rod
As an **early Second Sea rod**, the **Wildflower Rod** offers good resilience and control compared to other **Stage 1 rods**. Its higher **max weight (700kg)** makes it suitable for catching heavier fish in the area.
If you already have a strong rod from the **First Sea**, it may still outperform this one. If you choose to use the **Wildflower Rod**, **Hasty** or **Swift enchantments** can enhance its efficiency and improve your fishing experience.
Adventurer’s Rod
The **Adventurer’s Rod** is akin to the **Flimsy Rod** in the **Cursed Sea**, with extremely low stats, making it a temporary option at best. If you have a better rod from the **First Sea**, stick with that until you can **upgrade to something stronger**.
Its low max weight might help with specific rare fish, but it's **not worth investing resources** into enchanting. Save your enchantments for a more capable rod that will serve you better in the long run.
How to Enchant Second Sea Rods in Fisch

Using the **Enchant Relic** at the altar will apply an **Enchantment** to your rod. The **Enchantments** are random, so you might need to repeat the process until you get the perfect enchantment.
*And that is all the information you need to know about the **Rods** in the Second Sea. Check out our Fisch Codes article for freebies and E$ to help you buy the new rods.*